Step 3: Positioning the Fog
I may have created the fog objects but I have not done everything for you. Now you must copy and position them yourself. Doing so will help explain what is going on.All the Fog 1 objects their own separate layer, as are the Fog 2, Fog 3 and Fog 4 objects. To begin, hide layers 4, 5 and 6 by clicking on the eye icon in the layers toolbar from within the frame-editor. If you can't see the layers toolbar, press Ctrl+K. Note that you cannot hide a layer while it is selected.
You will now only see a single fog object, Fog 1.
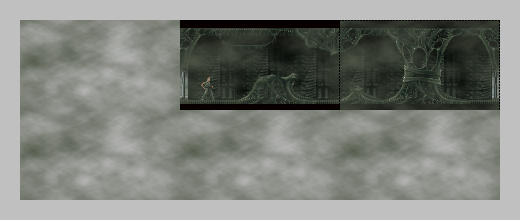
Now, in the file menu, click View and then Grid Setup. Change the grid size to 10x10. If Snap to grid is disabled, enable it. Next, by holding Ctrl and dragging the object, copy five new Fog 1 instances. Position them as shown in the picture below.
7